Using subclips
Creating subclips
Notice
To create subclips, the optional Clipbox add-on module "Clipout" is required. For further information, please contact support.stream@qvest.com.
A subclip is a section of an original file that is created by setting mark in and mark out points and saving the section as a separate file. Afterwards, the newly created file is available in the Media window and can be played.
Creating subclips is similar to trimming files. However, unlike trimming files, creating subclips results in creating new files.
Subclips can be created from completed and growing files as well as from linked key and fill files. In this context a common use case is to create subclips from growing files, which allows incoming material to be edited at the earliest possible stage (also referred to as "Highlight Clipping/Cutting").
To create a subclip, proceed as follows:
-
Make sure that the Media and File preview windows are displayed. If not, activate them.
-
Open the original file to be used in the File preview window by either double-clicking the file in the Media window or by selecting right-click > Open file in preview.
Tip
To create a subclip from linked key and fill files, open the corresponding container in the Media window via double-click.
-
Select the section of the file from which to create the subclip by setting appropriate mark in and mark out points as follows:
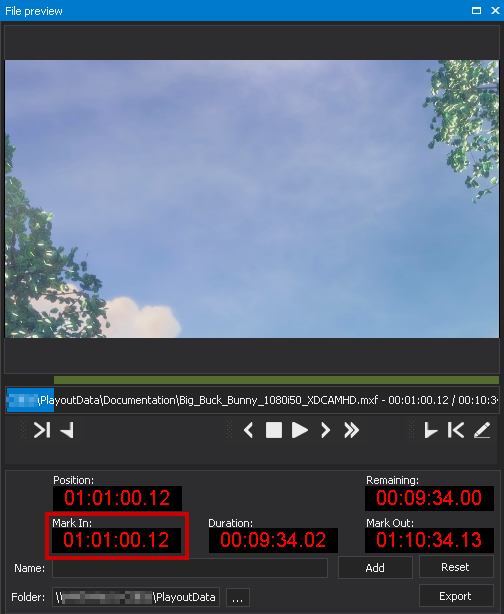
a. To select a frame-accurate time for the mark in point, either click directly on the corresponding position within the timeline or use the functions of the File preview toolbar.
b. To set the mark in point, click the Set mark in icon
 .
.The timecode for the mark in point is set and displayed in the Mark In field.
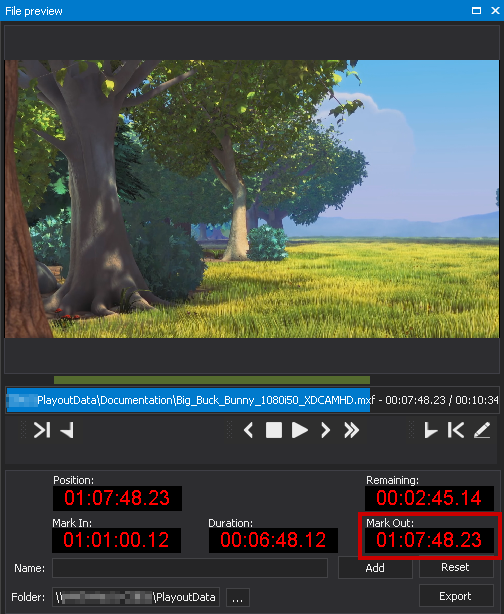
Mark in point set c. Select the time for the mark out in the same way, and then click the Set mark out icon
 to set the mark out point.
The mark out timecode is set and displayed in the Mark Out field.
Mark out point set -
In the Name field, enter a name for the subclip to be created.
- In the Folder field, select the export directory where you want to save the subclip.
-
Click Export.

Export subclip Notice
The Export button is available only when the optional Clipbox add-on module "Clipout" is enabled, which is required to create subclips. For more information, contact support.stream@qvest.com.
The selected section is saved as a new file in the selected export directory using the specified name. Afterwards, the resulting file is listed in the Media window.
Notice
When creating a subclip from linked key and fill files, two new files are created in the selected export directory. One file contains the key contents of the selected section and the other file contains the fill contents. The names of the files are additionally marked in the Media window by "_01" or "_02". Both files can then be re-linked.
Previewing and playing a subclip
A subclip can be previewed just like the original file from which it was created. There is no difference in the use of the two types of files.
The same applies to playing back a subclip via the clip list of a player.