Trimming clips
Trimming creates a section of a file by setting mark in and mark out points. Afterwards the file can be played either in full length or only the marked section.
Notice
Trimming does not create new files. The set points are only stored internally.
You can trim completed files as well as growing files and linked key and fill files.
Clipbox provides several ways for trimming files. Depending on the selected variant a created section is either only available temporarily (within the clip list of a player) or permanently (reusable via the Media window).
Files can be trimmed either via the File preview window (temporarily or reusable) or via the edit mode of the player (temporarily).
Notice
In the File preview window, only the video content of a file is played. This process is internal and independent of the system's live signal output. Existing audio tracks are muted during playback via the File preview window.
On the other hand, changes made in the player's edit mode are visible in the output signal and thus enable a live material preview.
Temporarily trimming a clip via the File preview window
If you trim a clip via the File preview window, the marked section can be applied to the clip list of a player and played.
Notice
The trimmed section is only temporarily available. It remains until you either change the set mark in and mark out points or remove the clip from the player's clip list.
To trim a clip via the File preview window, proceed as follows:
-
Add one or more files to the clip list as described in steps 1-3 in Creating and playing a clip list.
-
In the player clip list, right-click the clip you want to trim and select Open file in preview.
The selected file is opened in the File preview window.
-
Select the section to be trimmed by setting mark in and mark out points:
a. To do this, either click directly on the position to be used in the timeline or use the File preview toolbar functions to select a frame-accurate position for the mark in point.
b. Click the Set mark in icon
 to set the mark in point.
The selected time is applied to the Mark In time display and highlighted in yellow.
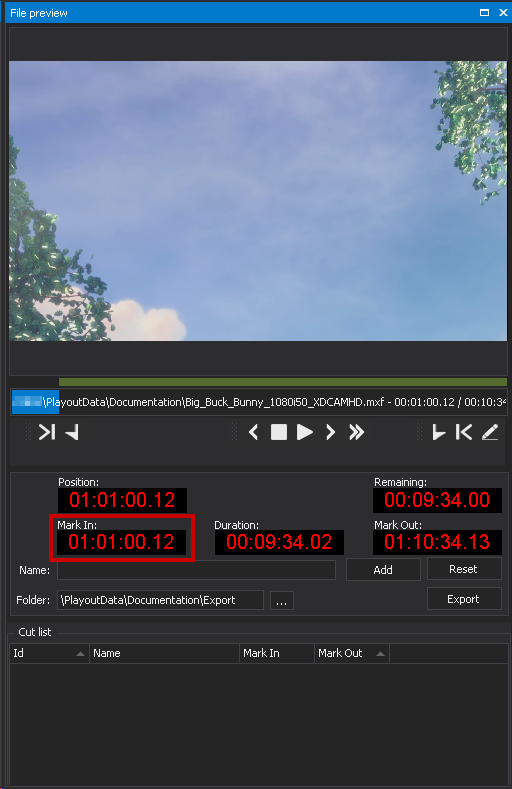
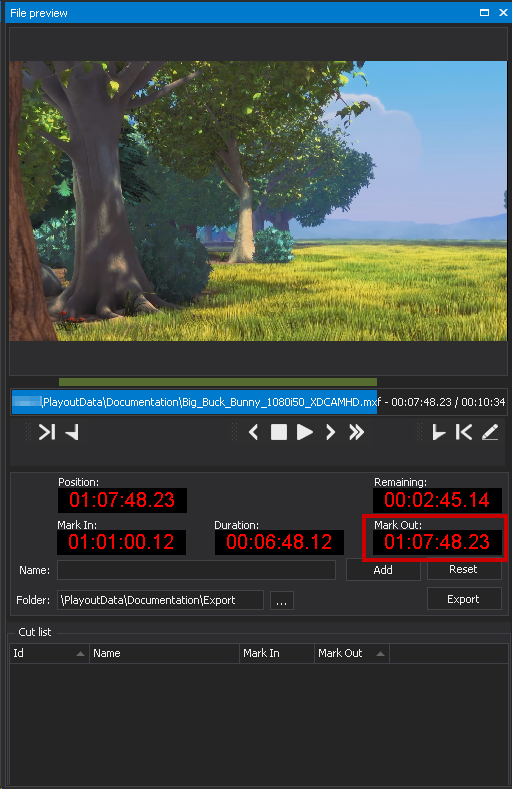
File preview - Mark in point set c. Select the time for the mark out in the same way and then click the Set mark out icon
 to set the mark out point.
The time selected for the mark out point is applied to the Mark Out time display. The Duration time display is also updated and shows the duration of the marked section.
File preview - Mark out point set d. To apply the set mark in and out points to the player's clip list, click the Take icon
 on the right side of the File preview window toolbar.
The marked section is applied to the clip and displayed in the clip list. If the clip is played afterwards, only the marked section will be played.

Trimmed section applied to clip list Notice
If necessary, activate the desired clip playback options. To control playback, use the playback control.
-
To trim more clips, repeat steps 2 and 3.
The clip was trimmed temporarily.
Trimming a clip reusable via the File preview window
Another way of trimming via the File preview window is to create a reusable section.
Notice
The set mark in and out points are saved internally, and the trimmed section is afterwards displayed in the Media window as a subordinate element of the corresponding original file. The trimmed section can be used like an original file and can be viewed, for example, via the File preview window or played via a player.
To trim a file and save a selected section internally for reuse, proceed as follows:
- Make sure that the Media and File preview windows are displayed. If not, activate them.
-
Open the file to be trimmed in the File preview window by either double-clicking it in the Media window or by choosing Right-click > Open file in preview.
Tip
To trim linked key and fill files, open the corresponding container.
-
Select the section to be trimmed by setting mark in and out points as follows:
a. To select a frame-accurate time for the mark in point, either click directly on the corresponding position in the timeline or use the functions of the File preview toolbar.
b. To set the mark in point, click the Set mark in icon
.The timecode for the mark in point is set and displayed in the Mark In field.
Mark in point set c. Select the time for the mark out in the same way and click the Set mark out icon
to set the mark out point.The time selected for the mark out point is applied to the Mark Out time display and highlighted in yellow. The Duration time display is also updated and shows the length of the marked area.
Mark out point set -
In the Name field, enter a name for the trimmed section to be created.
-
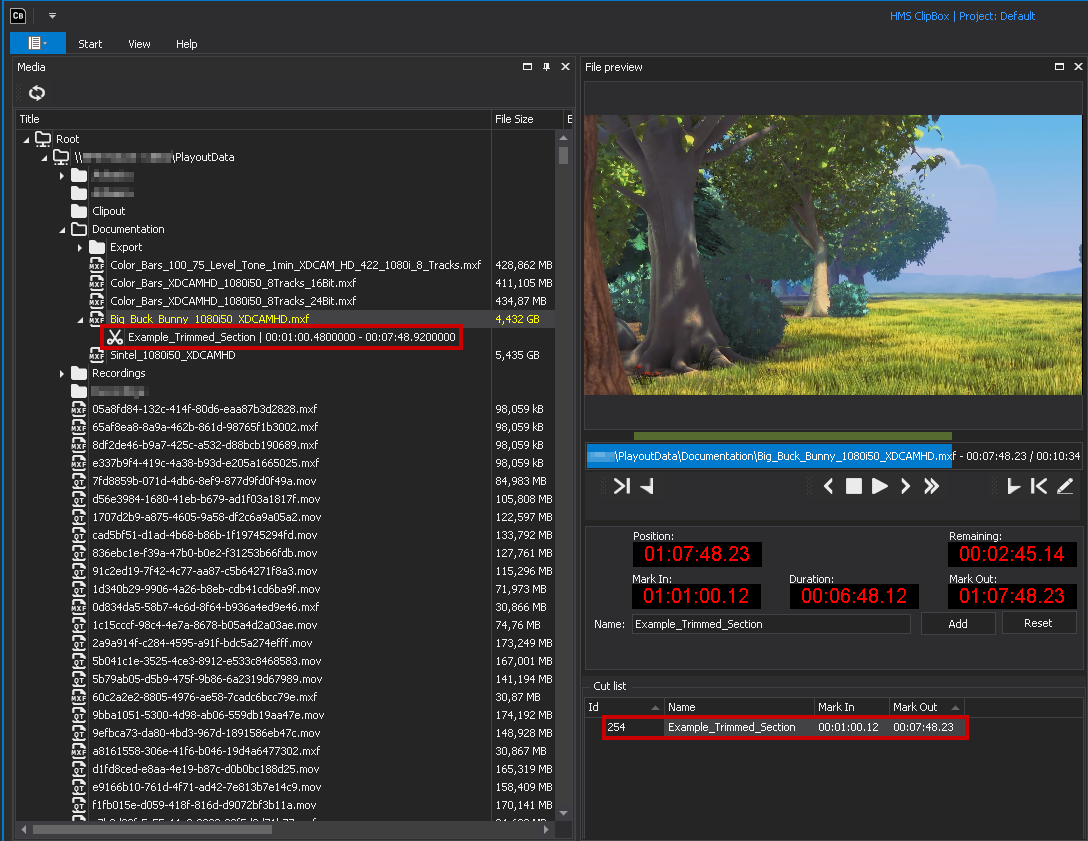
Click Add.

Add marked section to the Cut list
The selected area is added to the Cut list at the bottom of the File preview window using the specified name and the set mark in and out points. In the Media window, the original file is marked as an expandable element with the additional icon ![]() . You can list all available trimmed areas of a file by clicking on this icon.
. You can list all available trimmed areas of a file by clicking on this icon.
Tip
To delete a trimmed section, proceed as follows:
- In the Cut list select the trimmed section to be deleted.
- Select right-click > Delete selected trimmings.
The trimmed section is deleted from the Cut list and the Media window. The original file remains unchanged and stays available.
The clip was trimmed for reuse.
Trimming a clip via the edit mode of the player
Notice
To use edit mode, the corresponding toolbar must be enabled. The edit mode toolbar is an optional component of the Clipbox user interface that can be enabled or disabled through the Clipbox system settings. The Clipbox system settings should only be changed by trained personnel.
Via the edit mode you can trim the clip currently loaded by a player.
Notice
The trimmed section is only available temporarily. It stays available until you either change the set mark in and out points or remove the clip from the player's clip list.
To trim a clip using edit mode, proceed as follows:
-
Add files to the clip list as described in steps 1-3 in Creating and playing a clip list.
-
Click CUE in the playback control of the clip to be trimmed.
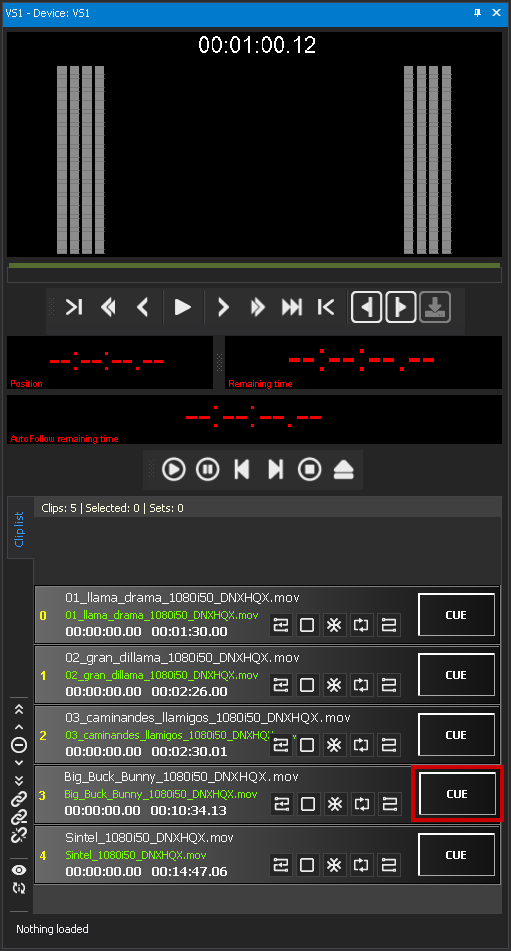
Cue clip -
Select the section to be trimmed using the edit mode toolbar.
a. First, select the time for the mark in point. To do this, either click directly on the position to be selected in the timeline or use the edit mode toolbar functions to select the time frame-accurately.
b. Then click the Set current position as mark in icon
 , to set the mark in point.
The timecode selected as mark in point is added to the clip list and highlighted in yellow.
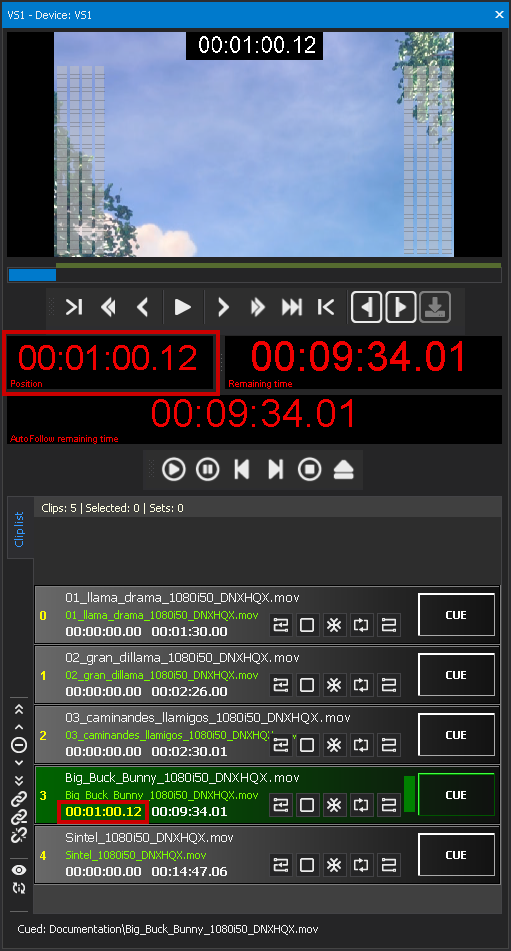
Mark in point set (via edit mode) c. Select the mark out time in the same way and then click the Set current position as mark out icon
 to set the mark out point.
The timecode selected as mark out point is applied. The duration of the trimmed section (defined by the set mark in and mark out points) is added to the clip list and highlighted in yellow. When the clip is played subsequently, only the trimmed section is played.
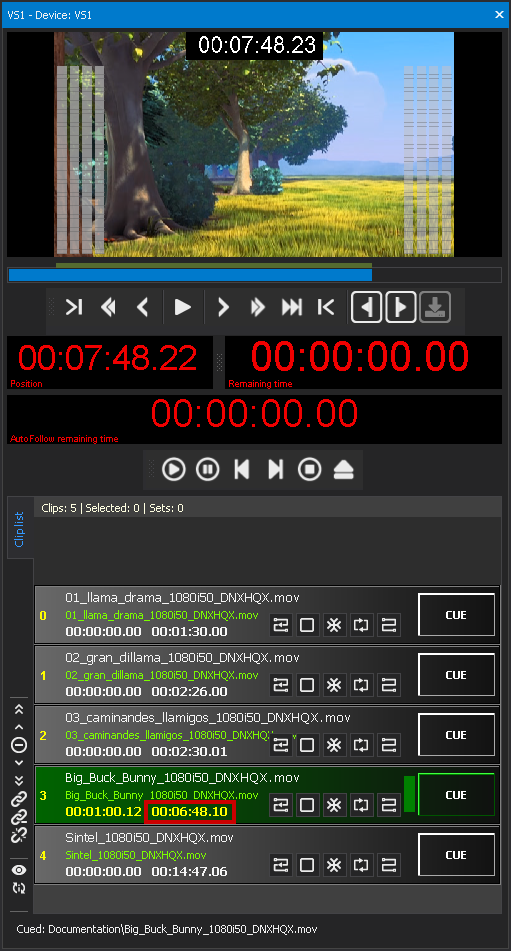
Mark out point set (via edit mode) Notice
If necessary, activate the desired playback options for the clip to be trimmed. To control playback, use the playback control.
-
To trim more clips, repeat steps 2 and 3.
The clip was trimmed via the player edit mode.