Scheduling clip playback
In addition to manual control, Clipbox allows you to schedule clip playback using pre-configured planned times.
Assigning a planned time
To assign a planned time to a clip, proceed as follows:
-
In a player's clip list, right-click the clip to which you want to assign a planned time.
The clip context menu is displayed.
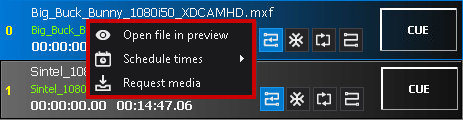
Clip context menu -
Select Schedule times in the context menu and select the desired playback time.
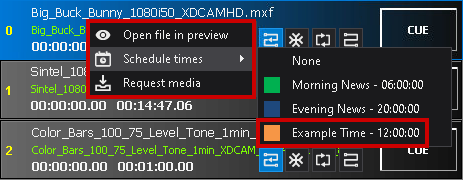
Select planned time The selected time is applied. The CUE button switches its label and now displays the selected planned time. In addition, the clip is marked in the upper left corner with the color of the selected planned time.

Planned time selected -
(Optional) To assign a planned time to other clips in the clip list repeat steps 1 and 2.
Notice
The same planned time cannot be used more than once in a clip list. If a clip is assigned a planned time already used by another clip in the clip list, the planned time is reassigned to the new clip.
Notice
A planned time is valid only for the day it is assigned.
The planned time was assigned. Clip playback starts automatically at the selected planned time.
Removing an assigned planned time from a clip
To remove an assigned planned time, right-click the corresponding clip and select Schedule times > None.
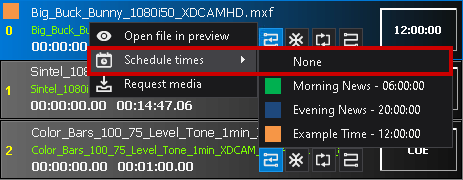
The planned time is removed, and the button switches its label from the previously selected planned time back to CUE. To play the clip again, you must either start playback manually or assign a new planned time.
